

We can all agree Maya is quite a remarkable program. From creating particle simulations to modeling a character, Maya can do just about anything in CG. Maya was clearly built for a lot of different artists, but not for any one of them specifically. As a character animator, Maya can serve most of your needs, but the program wasn’t built for character animators specifically, so doing simple tasks such as checking arcs or creating parent constraints can get complex and time-consuming. Lucky for us though, artists around the world have created numerous plug-ins, scripts, and tools to help Maya animators out. Below we’ve compiled a list of some of our favorite tools that will help make Maya a happier place to animate and speed up your animation workflow. The best part: a majority of the tools we list are completely free to download today.
1. AnimBot | Subscriptions starting at $60/year (Free for current AnimSchool students)
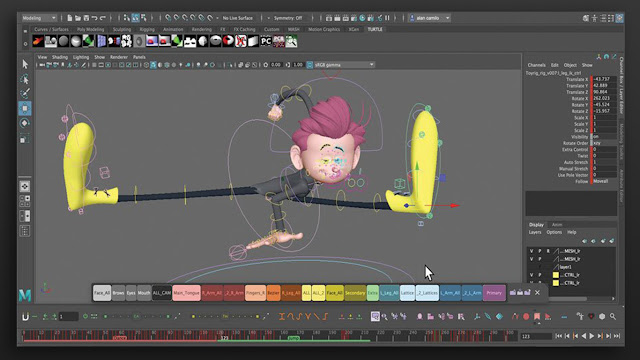
First and foremost, the plug-in professional and student animators alike swear by: AnimBot. Tailored specifically for animators, AnimBot is filled with 150 tools that make animating faster and easier. Some of its notable tools include the tween machine, retiming tools and selection sets. It is an essential plug-in for any Maya animator and absolutely worth the cost. To keep animators from getting overwhelmed by the myriad of tools, there are pop-up gif tutorials built into AnimBot that make it quick and easy to find out what any of its 150 tools do.
2. ZV Parent Master | Free

If you’ve ever felt lost in the world of Maya constraints - fret no longer! ZV Parent Master is a plug-in designed to make constraining objects simple and painless. With a few simple clicks, you can attach, detach and then reattach an object to a new object with ease. Retiming your attachments and detachments are as simple as shifting a couple keys, and for more complicated scenes, ZV Parent Master also has a colored timeline to visually show you what to and when an object is constrained. Currently offered for free, this tool is a must-have for animators.
3. bhGhost | Free
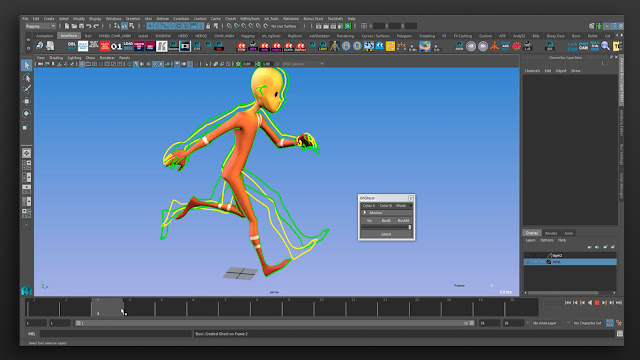
One thing many 3D animators forget is that despite the fancy 3D models that can be tumbled around freely in space, 3D animated shots are viewed on flat 2D screens. Ultimately, you are animating for the camera. In this way, classic 2D hand-drawn animation isn’t very different from 3D animation. With this in mind, tracking arcs and spacing on a 3D character can seem complicated compared to 2D drawings, where the spacing is obvious. bhGhost helps us bridge this gap by creating a way to transform your 3D model into a simple outline to help track spacing and timing. With this plug-in, you select your character's geometry, or whatever you want to track — whether it be a hand, a foot, or the entire character — and you ghost it. What sets bhGhost apart, is that it doesn’t simply onion skin your entire geometry. Instead, it creates an outline that reads as 2D to make it look like you're tracking a simple drawing instead of a complex, 3D rig. The plug-in allows you to change line thickness, color, and even add sphere trackers to the geometry to see parts of the body as a simple bouncing ball to track spacing. If you find that you have trouble tracking arcs and spacing with only your eye in Maya, bhGhost is definitely worth a download.
4. World Space 2 | $15

World Space 2 is a set of advanced animation tools for manipulating animation and switching between world, local, and parent spaces. First off, this tool is yet another way to constrain objects to each other. In this case, you put child objects into parent space and the tool will create temporary controls for you to animate with. Once you’re done, you can simply bake down the animation and have complete control over your character's original controls again. In addition, utilizing World Space 2 to put part of a character, such as an arm or head, into world space is a great way to do a final polish pass on animation since controlling how an arc will look to the camera in world space is much easier than in object space. In world space, you can fine-tune an arc by translating the head or limb more precisely. World Space 2 also includes a number of other features that allow you to create simple on-the-fly rigs for props, manipulate which channels you want space switching on, in addition to tools for creating paths and copying animation.
5. AnimSchool Picker | Free

The AnimSchool Picker allows you to select and control components within Maya, just like the pickers they use at the big studios. With the AnimSchool Picker, animators can easily select rig controls without the clutter of NURBS curves controllers in the viewport. There’s ample opportunity to customize your picker from colors, names, sizes, and alignment. Navigating the picker is simple and allows users to zoom, pan, and click and drag to select multiple controls at once. In addition to controllers, the picker can be used to select geometry and other components in your scene. Once you’ve created your custom picker, save it and reuse it for other characters by simply changing the namespace. The best part is that the AnimSchool Picker is free to anyone! I repeat you do NOT need to be an AnimSchool student to use this picker, however, students receive the perk of being able to use a number of pre-made AnimSchool Pickers included with their character rigs.
6. AnimPolish | Free (Basic Version)

7. FCM_Hider | Free

8. Convert Rotation Order | Free

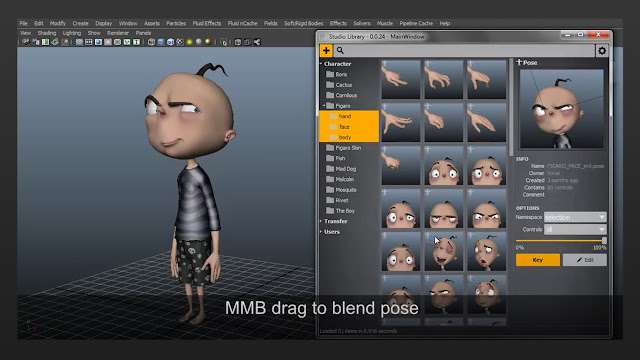
9. Studio Library | Free
10. Aaron Koresell Scripts | Free

No comments:
Post a Comment
Note: Only a member of this blog may post a comment.