Saturday, December 23, 2017

Maya 3D Modeling with nCloth


In this lecture, Animschool instructor, Brien Hindman shows how nCloth can be a real time-saver and can be used to create really interesting and complex shapes when used for modeling. 


Animschool is the premiere online animation school for learning 3D animation, modeling and rigging.
For more information about AnimSchool and its courses in animation, visit www.animschool.com


Tuesday, December 19, 2017

Introduction to Animation Layers - Tony Mecca


One helpful animation workflow method that many students don’t learn about until they take more advanced courses in animation is the use of Animation Layers. Animation layers are extremely useful for making non-destructive changes to parts of your shot while maintaining the animation that is working well. Animation layers are used mainly in the spline phase when you’d like to (or are directed to) make adjustments to certain portions of your animation, or you want to try out different poses and motions. They can save you a lot of time and effort when you’re making changes, and help make you a more efficient animator overall. In this clip from a Body Mechanics class, which is our third introductory course in 3D character animation, instructor Tony Mecca does a great job of explaining the fundamentals of how Animation Layers work by relating them to layers in Photoshop, and showing an example in Maya.


The following are covered in this video:
  • How animation layers work
  • How to set them up
  • How to tweak your animation with keys in the animation layer
  • How to adjust how much the animation layer affects the base animation
  • How to merge the new animation with your base animation


For more information about AnimSchool and our online animation programs, visit us at www.animschool.com

Thursday, October 19, 2017

Blocking Lecture 2- Layered method


In this lecture, Animschool instructor, Hans Dastrup explains the "Layered" method of blocking. He provides the pros and cons of the method and situations where this blocking method can be used efficiently.


For more information about AnimSchool and its animation program, visit www.animschool.com

Saturday, October 14, 2017

Blocking Lecture 1- Pose to Pose


In this lecture, Animschool instructor, Hans Dastrup explains the "Pose to Pose" method of blocking. He provides the pros and cons of the method and situations where this blocking method can be used efficiently.


For more information about Animschool and its animation program: visit www.animschool.com

Tuesday, September 19, 2017

Open House/Q&A at AnimSchool! Come See What it's Like

Are you thinking about learning 3D animation or characters modeling?
If you are considering applying to be a student at AnimSchool: come to our free public open house this Friday 6pm Pacific, 9pm Eastern time.
Come and get a sneak peek of the new student pages, all the resources and what it's like to be a student here at the school.
There will be a short presentation of our school and site and we will take your questions live.
Bonus! We will have several current AnimSchool students and instructors there to answer your questions as well.
To register for this live event and get more info, click here.
This event is expected to fill up, so register now to attend live, or receive the recording link afterwards. 

To find out when this is in your timezone, change your timezone here: http://www.animschool.com/TimeZoneSelection.aspx
If you set it correctly, go here to see the event:
http://www.animschool.com/AcademicCalendar.aspx
You can have your webcam/mic ready OR if you don't have one, you can still listen and chat with us.
AnimSchool: makers of the famous Malcolm rig and AnimSchool Picker used by tens of thousands around the world! We are known for our high quality, expressive rigs and student achievement.

Friday, September 8, 2017

Q&A Session - Manuel Bover & Jarrod Showers


In AnimSchool's Q&A Session, instructors Manuel Bover and Jarrod Showers answer questions from our students about the industry.


 Come join us at www.animschool.com

Tuesday, August 29, 2017

New AnimSchool Game Character: Riker


We are pleased to present AnimSchool's newest game character, Riker!
Students in our upper game animation classes can learn using Riker.

Riker is made using an all new rig initiative - we've taken the extreme facial expressiveness AnimSchool is known for and brought it to the game rig world! Riker has a wide range of expressions not usually seen in games.

Riker was designed by artist Wesley Tippetts and modeled by Paul Bellozas and Dave Gallagher. Texturing by Paul Bellozas.

Come join our gaming animation classes to learn skills with AnimSchool rigs!


Thursday, August 24, 2017

Facial Anatomy- Wesley Mandell


In this lecture, AnimSchool instructor Wesley Mandell explains how important it is to understand facial anatomy in order to animate well.


For more information about animation, join us at www.animschool.com

Friday, July 14, 2017

Stepped or Spline?


Stepped and spline refer to the way your keyframes are interpolated in an animation. Stepped means that there is no change in values between two keys.  With spline, the computer automatically adds in-betweens values between two keyframes.

Most 3D animation is splined in the end, making smooth motion, but there are two main ways of starting out when animating. So stepped and spline also refer to two different workflows.

With Stepped, you focus on key poses and only work on those keys. When you hit play, the software plays it like a series of drawings.


Pros


The biggest benefits of working in stepped mode is that you can really focus on the key poses for your shot. Since the software doesn’t interpolate between any of the keyframes, stepped mode allows you to keep your shot very clean in a way that you can tell the story of your animation with a small amount of keyframes. 

In other words, stepped mode helps you establish the important beats of your animation and allows you to get a basic idea of the timing while focusing on the key ideas of the shot.

Your graph editor is more manageable, and big changes are easier.


Cons


The biggest drawback of stepped mode is that it can be hard to envision how your timing is going to turn out. Animators fill in more and more poses as they go, but there is a point when you have to leave the stepped world behind and convert the curves from stepped to spline. That's a simple click, but seeing your hard animation work that way is nearly always a disappointment.


If you are an animator, you’ve probably seen how an animation loses its snappiness when going from stepped to spline. This is because your brain had been filling in the gaps but now the computer interpolates between each keyframe. The simple version you were used to looking at wasn't a very complete representation of the movement. It's the time when you get a big surprise seeing it with fluid motion - and it's never a pleasant one!


Spline: Another method of starting out is skipping the stepped keyframes entirely and having smooth movement from the very beginning, where you focus on the overall movement of the body and don't worry about the poses yet.

You start by moving the rig's root control or COG (center of gravity) to find the movement of the scene in a fluid way. Then you layer in the spine and head's motion, and the limbs.

Pros


Spline gives you the possibility to work more straight ahead and feel how your animation is going to look already in the early stages of blocking. You skip the painful process of getting used to looking at simplified stepped movement, only to hit the hard reality of the ugly "first spline" phase later.
If the movement doesn’t feel right, it is easy to shift individual keyframes around until you get what you are looking for.


Cons


It’s easy to get distracted by the interpolation of the keyframes and not focus on posing when using splined curves to block out a shot. It may also be hard to work in a clean way - the keyframes aren't neatly organized on individual frames - they are scattered all over.

Since you're not spending time on making beautiful poses up front, the posing can suffer and feel like an afterthought.

Students can have a difficult time learning with a spline method, since they get used to seeing bad motion and aren't able to see how to improve it, and instructors aren't able to see which timing decisions were made consciously and which are just the raw computer interpolation. At least with stepped blocking, an instructor knows exactly what the student's posing and timing decisions are and can give specific ways to fix it.

Spline workflow is often associated with faster productions since the motion is worked out earlier, and it avoids that two-step process. But it is also associated with lower production values because of that.

However experienced animators can achieve excellent results with a spline workflow as well since they know how to overcome these issues. Now spline workflow is used at all ranges of quality, from the cheapest animation to the very best animation.


Although one method might be better than the other depending on the shot being animated, choosing stepped or spline comes down to personal preference. It is important to try both of them out and determine what’s better for your type of workflow.


Happy animating!

Monday, May 22, 2017

Acting choices: Is it a cliche?


"Never bluff emotions. This lady (the camera) would know."- Michael Caine


There are two ways animators define clichéd acting choices.
1: These are the acting choices that we have seen repeatedly in similar shots so we would prefer to see something else.
2: These are the "go to" acting choices that pop into our heads when we think of acting for animation. For example snapping fingers and smiling to show that the character has an idea or is having a "A-Ha" moment. Or a snarky, knowing smile with one eyebrow down and the other raised.

Most of us animators grew up watching animation. Animated TV shows, Disney, Ghibli movies have introduced us to the magic of animation and motivated us enough to become storytellers ourselves. These shows that we grew up watching constitute a big part of our visual library. Intentionally or not, whenever we think about animation ideas, we tend to go to that library to pick out poses, gestures and actions. Even when we act for our animation references, we often try to emulate that level of broad, exaggerated acting choices. We act and animate as we think it should be and go for acting choices that depict our perception rather than the personality of that character. Every character we animate risks becoming just a copy of our personality or something too close to it.

Now, there is nothing wrong with having a visual library that is built on the work of such amazing movies and television shows: it is actually a great thing. However, it would be a shame to not take that knowledge and build on it. Instead of going back and re-using same poses, same acting choices and same actions, it is better to reinvent them, based on your character. As our AnimSchool instructor, Garrett Shikuma put it, "When you can't re-invent the wheel... put your own spin on it."
This spin can come from the personality of the character that you are animating. It can come from the situation that the character is in or it can come from the design or limitations of their body.

So how to avoid clichéd acting choices?

In order to avoid the obvious clichéd choices, consider these:

1. Acting based on personality and subtext: Instead of thinking about the action, think about the thought process and the personality of the character. Is the character an extrovert or an introvert? When he gets an idea, does he act broadly, jumping up and down and using the space available to him or he is an introvert who just shows that he has gotten an idea by having his eyes widen. How good are his people skills? Questions like these really help one to narrow down the personality of a character.
Once you are sure about the personality it is time to think about the subtext.
The subtext is the unspoken thoughts. It is the content underneath the dialogue and reveals the true motives that drive the character to act in a certain way. Finding the subtext and coupling that with the personality of the character would make your acting choices authentic to the character.


2. Watch live action movies and study the 
acting choices: Pick a movie that has a good critical acclaim and study it. are the choices that they could have made but instead chose something else. This will help you bypass the obvious choices and come up with more creative acting choices.
Why are the actors doing what they are doing? Or you could consider it from another angle: What

3. Bring your life experiences to your work: Let your own culture and experiences influence your acting choices. But try to make sure that your choices will be decipherable by others. Your work should be original and interesting but also universally understandable. Otherwise, the audience won't be able to connect to it and your storytelling may suffer.

4. If cliché has to be used, then do it well: Clichés are good in the sense that they get the point across clearly. Everyone has seen them; everyone understands them. Sometimes the best choice turns out to be a clichéd action. If that happens, then do it well. Make sure it serves its purpose well and adds something to the overall performance. These acting choices, just because they are used repeatedly are not necessarily bad choices - we just want to avoid too much sameness. If every girl character starts tucking her hair behind her ear every time she gets confused, we are going to get tired of it. So you may want to pair that action with other elements that we haven't seen.


For more animation tips and tricks, visit our online 3D animation school, www.animschool.com and for more awesome animated shots like these, watch our student showcase of 2016 here

Friday, May 12, 2017

4 Free Maya Plugins For A Better Workflow Part II


1. aTools


Created by animator Alan Camilo, aTools not only enables you to easily select sections of a rig quickly but also stores lots of handy tools in one convenient place. It makes your work flow faster and it’s very easy to install; just drag and drop it into your Maya viewport!


Click here to download aTools!


2. Studio Library


This plugin allows you to save out your character poses and also export your animation. Creating a good character pose can take a lot of time, but being able to save those poses and find them again in a hurry can save a great deal of time and work. Apart from saving poses, Studio Library also lets you mirror them and organise them into folders of your choice!


Click here to download Studio Library!


3. Pose2Shelf


This plugin lets you save and label poses and current selections to your shelf by just pushing one button! Pose2Shelf comes in handy not only when you have to set a lot of keys on your shot but also when you are transferring a lot of animation onto characters!


Click here to download Pose2Shelf!


4. AnimSchool Picker


The AnimSchool Picker is a plugin that provides a GUI for selecting rig controls or geometry on 3D characters more quickly.

It is tightly integrated into Maya and Softimage, highlighting when you make a selection in Maya, as well as picking from the buttons.

Users can zoom and pan using standard Maya/Softimage navigation hotkeys, make single or multiple object buttons and make script/command buttons.

The AnimSchool Picker also gives you the possibility to move buttons or groups of buttons with the control key, nudge buttons precisely with the arrow keys and arrange and distribute buttons horizontally or vertically.


Click here to download the AnimSchool Picker!

Friday, April 28, 2017

AnimScool Animation Student Showcase 2016


A compilation of AnimSchool student animation work from 2016. Great work!

Apply to be a student at http://www.animschool.com

Friday, April 21, 2017

Animating Eyes - Manuel Bover


In AnimSchool's Workshop on eyes, Animator Manuel Bover shows how to animate a standard blink.


Come join all the students learning online at AnimSchool: www.animschool.com

Monday, April 10, 2017

3 Free Maya Plugins For A Better Workflow


There are plenty of plugins for Maya out there, some are free and others come at a cost, but they are all meant to make your life a bit simpler. Here are 3 free Maya plugins that will make your workflow smoother and more efficient:


1. BHGhost


This script, developed by Brian Horgan, creates a 3D outline of your animation in the Maya viewport. Similar to the “onion skin” technique used by animators to see multiple frames at once, BHGhost shows semi-transparent animated objects in a scene to have an idea of the animation being created. In that way, it is possible to see the relation between poses and refine your animation even further.


Click here to download BHGhost!


2. tweenMachine


Created by AnimSchool’s instructor Justin Barrett, tweenMachine simplifies the process of creating breakdown poses. In other words, this plugin reduces the amount of steps it takes to create poses for your character with stepped keys, as it gets you closer to your goal a bit faster than other methods. 


What makes tweenMachine different from setting poses manually, is that it allows you to put keys on all the control curves, without having to manipulate individual controls one by one. Just by adjusting a slider you can see the results immediately!


Click here to download tweenMachine!


3. shotView


This plugin provides a clean representation of your camera view in a floating window. It is extremely useful for animators using two monitors, as it allows you to view both the default Maya perspective and the camera view at the same time. shotView also sets up automatic filtering options that will turn off any controllers that you don’t want to see when running a playblast.

There is also the option of dual window functionality which allows you to setup a main camera view and use any number of embedded cameras containing any controllers or special setups to help you with your animation. You can swap between these cameras really easily using the shotView camera switching buttons.

Click here to download shotView!


To know more about our online programs, visit www.animschool.com


Friday, March 24, 2017

Blocking The Mouth - Garrett Shikuma


In AnimSchool's Character Performance class, Animator Garrett Shikuma shows how to start blocking the mouth for a dialogue shot.


To know more about our online animation programs, visit www.animschool.com

Monday, March 20, 2017

5 Acting Tips for Animators with Examples


Acting for animation is an important but a very tough step for an animator to take. The choices one makes for the story, make or break his/her animation piece. There is no denying that doing animation well is very important; no one wants to see a badly moving character with jerks and knee pops but if one makes cliched choices, misses the beat or goes for an acting choice that lacks interest then no matter how good the animation is, audience just won't pay attention. As a storytelling artist, this would be a nightmare.
Acting for animation is also a very broad subject. In this blog post, I would, therefore, like to present top five acting tips shared by our AnimSchool instructors. I hope that these will help you make better acting choices for your animations may it be a pantomime or a dialogue piece.

1. Keep It Very Very Simple

One of the things new animators tend to do is to over-complicate things. Some do it because they think:
a) it will make their animation more interesting;
b) it will help them flaunt their animation skills and
c) doing a simple motion would not help them impress their recruiters.
They want to do something different and thus often make complicated choices. As our AnimSchool instructor points out, simplicity sells the story most, not the over-complicated steps.


Following is the work of an AnimSchool student that explains this point well.


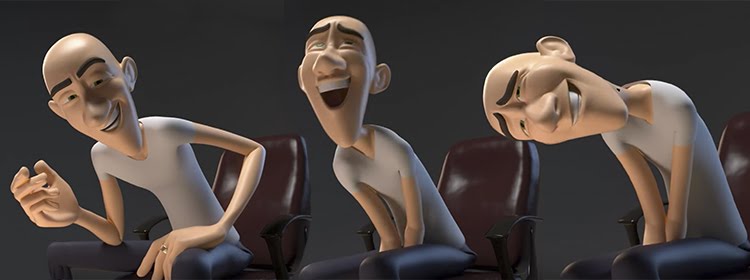
2. The Personality of A Character Drives Acting Choices

Before you start shooting reference for your character, build up a personality for him/her first.
  • Who is the character? 
  • What is the goal? 
  • How is he/she feeling at the moment? 
  • What is the history of this character? etc.
 After you figure it out, you need to start making your acting choices on the basis of that personality.
It is important to understand that it should not be "YOU" acting as "YOU" in front of the camera. It should be the character doing what he/she is supposed to be doing at that particular point.

Our AnimSchool instructor, Garrett Shikuma describes this point best with an example in the following video.


Here is an AnimSchool student who demonstrates this point in this following video.


3. Don't Make A Generic Character

If you are making a dialogue shot, chances are that it is only going to be 10-15 seconds long. In these few seconds, you will have to define not only a character but also the situation the character is in, to the audience in the best possible way. If you truly want to stand out from the other animators, it is very important to flesh out the story element and the scene before shooting reference. One of the best ways to do so is to think not just about that scene but also make up a story outside the scene; maybe something has happened before the shot and that's why the character is acting in a certain way or something is about to happen. This will help you make better acting choices as the character won't be just going through motions but would have intent behind every action and that will help you get the best possible acting choices for your scene.

Our animSchool instructor, Terence Bannon describes this point eloquently in the following video.


This whole idea is encapsulated very well in the following work of AnimSchool graduate.


4. Know Your Rig Well

Before shooting reference, it is important that you understand the limitations and strengths of the character rigs you are going to use. Not every character has humanoid proportions. Sometimes there are characters with huge chest but very small hips and legs. There might be limitations over how much you can control face of the rig. So, try to understand the weaknesses and strengths of the rigs before shooting references. Even if you shoot a brilliant acting reference, it would be of no use if you fail to translate it properly onto your rig. Our AnimSchool instructor. Thom Roberts explains this point in the video below.


Here is the example of such reference shooting by one of our students.


5. Be Visual

As our AnimSchool instructor points out below, animators are visual people. We like to understand story through visuals so don't be coy; be as much visual as possible. Remember, the animation shot is only a few seconds long so use props, costumes, stage your character as much as possible. From the first frame, it should be apparent as to what is going on. Don't hold back!


Following video of the AnimSchool student illustrates this point very well.


I hope this blog helps you with your next animation project. Keep animating!

For more such lectures and tips, apply for AnimSchool's online 3D animation classes at www.animschool.com

Exaggerating To Your Advantage


What makes animation fun is bringing things to life. Animators often study reference video to get inspiration from real movement, but sometimes what we see in real life doesn’t translate well to animated shots. This is where exaggeration plays a major role; we caricature the motion to stylize the visual result. Without exaggeration an animation can feel boring or lifeless.


Animation gives us the possibility to explore movements that don't necessarily obey the exact rules of real-life physics. With animation we have the chance to take the foundation of real-life physics to a higher level with exaggeration, resulting in something much more interesting and fun to watch.


Real-life movement and poses and acting is already interesting, but how much more entertaining it can be to put your audience into an alternate reality, where the rules of physics and nature are bent and stylized a bit - to make something truly unique.


How would you enjoy watching a classic Bugs Bunny short but with realistic, motion-captured movements?  It wouldn't be as enjoyable would it?

It is easy to feel limited by the rig you are working with, but you shouldn’t be scared of pushing it beyond its limits. Although rigs can be broken, it is likely that when played back at full speed, what looked weird for one frame of your shot may be unnoticeable. Testing the rig you have and finding how you can work around its limitations is always useful. Remember to break the rig to your advantage!

One way to exaggerate your animations is through your poses. Animated poses aren't just a reflection of real life, they are staged for the camera or audience's view to more fully embody the moment and action, carefully crafted to tell the story and convey the emotion the best way possible. A carefully crafted exaggerated pose creates more appeal -- it's more interesting to look at. There may be times when you match the pose exactly as you see it in video reference and that may work well, but you will want to find places and parts of the body you can push to make the pose work better. A great way to do this is first creating the pose you see on your reference and once you are satisfied, go back to it and figure out how you can make it more interesting. Can you simplify the line of action running through the body? Can you create a stronger contrast with other storytelling poses? Is this the best, most entertaining way to make this pose?


The other major opportunity is exaggerating timing. Animated movements often have simplified transitions, sped up to emphasize the poses before and after. That makes an animation look "snappy".

The timing in your video reference should only be used as a guide and most often you want to push it for maximum effect. Imitating reality can lead to very floaty and dull animations.

Depending on the context, exaggeration can be in small or large amounts. If the production and designs are more realistic, exaggeration should be minimal. More stylized designs lend themselves to more stylized movement and posing.  It is important to keep in mind that a subtle exaggeration in timing or spacing may be just what your animation needs. Don’t forget that you often want to feel the exaggeration more than you want to see it!


Friday, March 10, 2017

Develop Your Skills As An Animator!


Mastering the art of animation can be truly hard. It can take years of hard work and dedication to get you to where you want to be, and as technology grows and develops, there are always new things to be learned in the animation field. However, following the right workflows and techniques can help you develop your skills as an animator faster than you might think.


It’s all in the basics!


When you start learning animation, you might want to tackle a walk cycle or a complex acting shot right away. Still, you should start out simple and try not to take on an animated shot above your skill level, as it will probably frustrate you when you should be having fun! 

Instead, you should start with a simple ball bounce. This is the first exercise any animator must master. Once you feel confident, you can move on to animating a ball bounce across the screen and eventually incorporating squash and stretch, adding more personality to the ball. Soon you will see that with each new exercise you tackle, your skill level will grow and you will have incorporated new animation principles to the mix. Remember: working in small chunks will guarantee that each technique is mastered before you can move on!


Get Inspired


One of the best ways to improve your animation skills is to find out what inspires you as an animator. Watching your favorite animated movie is a great way to study how the animator incorporated the principles, so you can then try to implement those techniques into your own shot. Keep in mind: watching these amazingly-executed animations should make you want to jump onto the computer and animate, and not make you feel discouraged by their level of complexity. Use movies to inspire you to get to that level! 


Get Your Body Mechanics Working


Once you know the principles, you can start learning about body mechanics. Knowing how a human should move is they key to a great acting shot. The best way to start is by animating a simple walk cycle. Once you have nailed that down, you can try to animate a character walking and coming to a stop. Take each exercise one step at a time and keep them short, from three to four seconds. Each shot will be a bit more difficult than the last, but as your skill level grows, you’ll be amazed at how much you’ve progressed.


Act It Out


Once you feel ready to take on acting and dialogue shots, on of the most useful things is to study live action films. You can take a scene in a movie and analyze the actor’s movements. This is a great exercise to help you incorporate small nuances found in great acting. 


The More Feedback The Better


Working on your shot for a long time can make you skip little mistakes. In other words, if you are the only one looking at your animation, it can get very hard to give yourself feedback and notes. Asking for someone to look at your shot, even if that person doesn’t have animation knowledge, will help you see if something isn’t looking right. Remember not to take it personally if someone has a different idea for your shot-- sharing your work is a great way to improve! 


Don’t Forget!


Learning animation is a never-ending process, but learning it in small chunks and having the right mindset will ensure that your animation skills grow faster. It’s not about the length of your shots, but rather how many shots you get completed and how much you push yourself with each one!


Come join us at www.animschool.com